After a long winter of tough boots and fleece socks, the sandals season is finally here. Now you’re thinking, what’s an ideal approach to get into the soul of spring and feel totally sandal-ready? A rich DIY pedicure, obviously!
Stage 1: Soak
Begin with perfect, clean free nails. Fill a bowl (or your bath) with warm water and add body wash, hand soap, dish soap or any soap of your choice. Place your feet in it and allow it to soak for a few minutes.
Stage 2: File
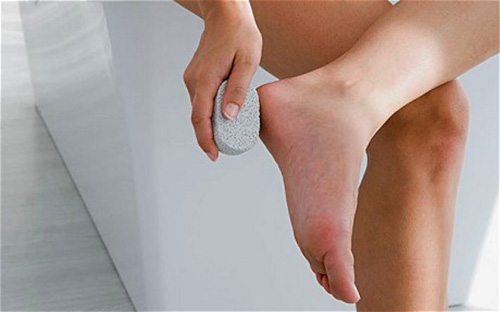
Take out your feet and scrub them with a foot file while they’re slightly wet, concentrating on the rougher territories. Some foot files come with a fine and coarse grain. Begin with the coarser grain to file calluses and then move to the fine grain side to smoothen it gradually. It doesn’t matter what side of the grain you use because both sides can get the job done.
Stage 3: Scrub
After the scrubbing session, dunk your feet over into the bowl to wash and after that, wipe it clean with a damp towel. Some scrubs contains chili pepper oil so it is imperative you wash your hands after this stage.
Stage 4: Shape
It is absolutely the right time to bring your manicured Kit to shape and clip your nails. Ensure you clip each of the nails straight out and then, use an emery board underneath the edge to tenderly smoothen and shape each nail. The next step is vital so your cuticles can be soft and you can prevent your nails from damaging.
Stage 5: Cuticles
Apply a few drops of cuticle softener and Remover to each of the nail bases. Allow your nails a few minutes so the cuticle softener can soak up and do its job. After that, it is time to get your cuticle pusher to work.
Lay the bended end of the pusher on your nail plate and gently push back your cuticles.
Wash your feet thoroughly so the residual cuticle softener can be cleaned off your nails. Wipe it clean.
Stage 6: Polish
Insert toe separators between all toes on the two feet, and sit in a position that you can easily access your feet. Apply a base coat and allow it to dry for a few minutes. After that, you polish the nails! Apply maybe a couple layers of shading and after that, finish it up with a final layer of your favorite top coat. For a lasting and smooth pedicure, apply a thin layer of polish and give it a few minutes to dry up before proceeding with the next.
Stage 7: Mint Condition
Apply some fresh Mint Condition to your feet after your polish is completely dried up. Squeeze the required amount into your hands and apply them onto the top and bottom of both your feet.
After this step, you are done! What precedes this is to get your sandals from your closet because this awesome pedicure ought to be flaunted.